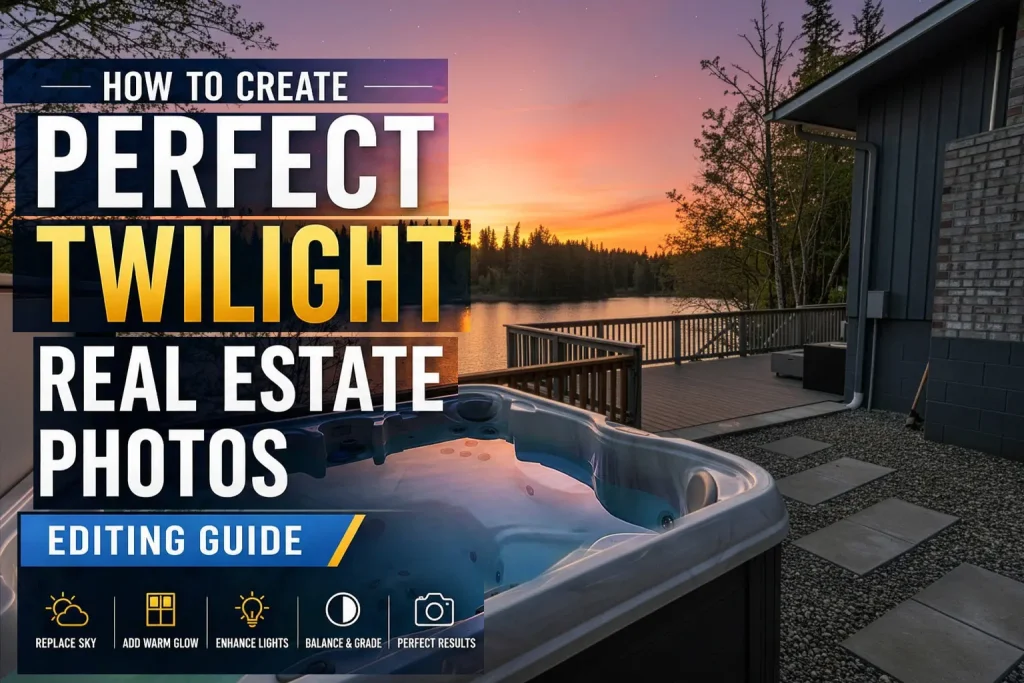
How to Create Perfect Twilight Real Estate Photos (Editing Guide)
Kiran 4 min read min read 29 Apr 2026
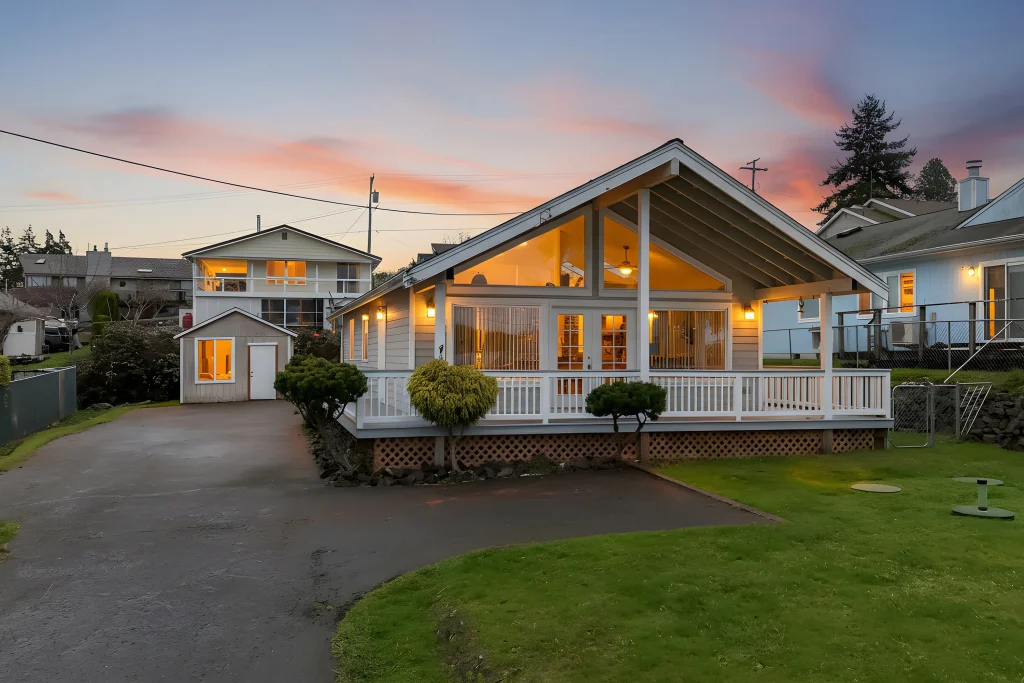
Twilight real estate photos are among the most powerful visuals in property marketing. The combination of a deep blue sky, warm interior lighting, and balanced exposure creates a premium, inviting look that instantly grabs attention.
The best part? You don’t always need to shoot during sunset. With the right editing techniques, you can transform a standard daytime image into stunning twilight real estate photos that look natural and professional.
In this guide, you’ll learn a complete step-by-step process to create high-quality twilight images that elevate your listings.
Why Twilight Real Estate Photos Work So Well
Twilight images are highly effective because they:
- Capture attention on listing platforms
- Create a luxury and emotional appeal
- Showcase both interior and exterior lighting
- Help properties stand out in competitive markets
For real estate agents and photographers, using twilight real estate photos often leads to more clicks, stronger first impressions, and higher perceived property value.
What You Need Before Editing
Before you start creating twilight real estate photos, make sure your base image is strong.
Recommended Tools
Most professionals rely on editing software like Adobe Photoshop and Adobe Lightroom. These tools allow precise control over color grading, masking, and exposure adjustments.
Image Requirements
- A well-exposed daytime photo (golden hour works best)
- Straight vertical lines and proper composition
- Clean windows for realistic light glow
Avoid harsh midday lighting, as strong shadows can make twilight editing more difficult.
Step-by-Step Twilight Editing Process
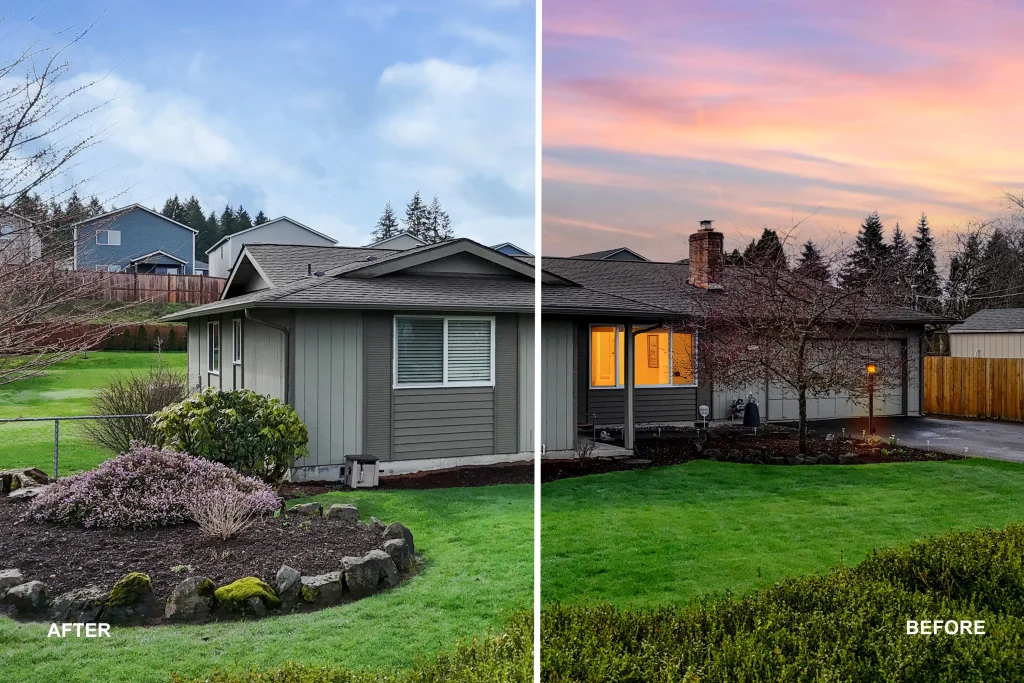
1. Sky Replacement
This is the foundation of creating realistic twilight real estate photos.
- Replace the daytime sky with a twilight or blue-hour sky
- Choose natural gradients (deep blue to soft orange tones)
- Match the lighting direction and perspective
Pro Tip: Avoid overly dramatic skies—they can look unrealistic and distract from the property.
2. Adjust Exposure and White Balance
- Slightly reduce highlights
- Lower overall exposure
- Shift white balance toward cooler (blue) tones
The goal is to simulate early evening lighting—not complete darkness.
3. Add Warm Interior Window Glow
This step brings life to your image.
- Add warm yellow/orange tones to windows
- Use soft masking for a natural glow
- Create subtle light spill around window edges
Keep it balanced—too much glow can look artificial.
4. Enhance Exterior Lighting
- Brighten outdoor lights (porch, garden, pathways)
- Add subtle glow effects
- Increase contrast slightly for depth
This enhances the overall mood and adds a high-end feel.
5. Balance Shadows and Highlights
- Lift shadows gently while maintaining depth
- Avoid making the image look flat
- Keep the property as the main focus
6. Color Grading for Twilight Mood
- Add cool blue tones to shadows
- Keep highlights warm
- Use split toning for a cinematic effect
This creates the classic contrast seen in professional twilight real estate photos.
7. Final Touches
- Sharpen the image
- Reduce noise (especially in the sky)
- Remove halos around edges
- Ensure smooth blending between sky and structure
Common Mistakes to Avoid
When creating twilight real estate photos, avoid these issues:
- Over-saturated skies
- Unrealistic window glow
- Incorrect lighting direction
- Poor exposure balance
- Ignoring reflections in glass surfaces
The goal is always a natural and believable result.
Pro Tips for Better Results
- Use bracketed images for better dynamic range
- Turn on all lights during the shoot
- Maintain a library of high-quality sky overlays
- Keep editing consistent across all images
Consistency plays a big role in building a professional portfolio.
When Should You Use Twilight Editing?
Not every listing needs twilight images. They work best for:
- Luxury properties
- Homes with outdoor lighting features
- Listings with large windows
- Waterfront or scenic properties
For simpler listings, a clean daytime edit may be more effective.
Day-to-Twilight vs Real Twilight Shoot
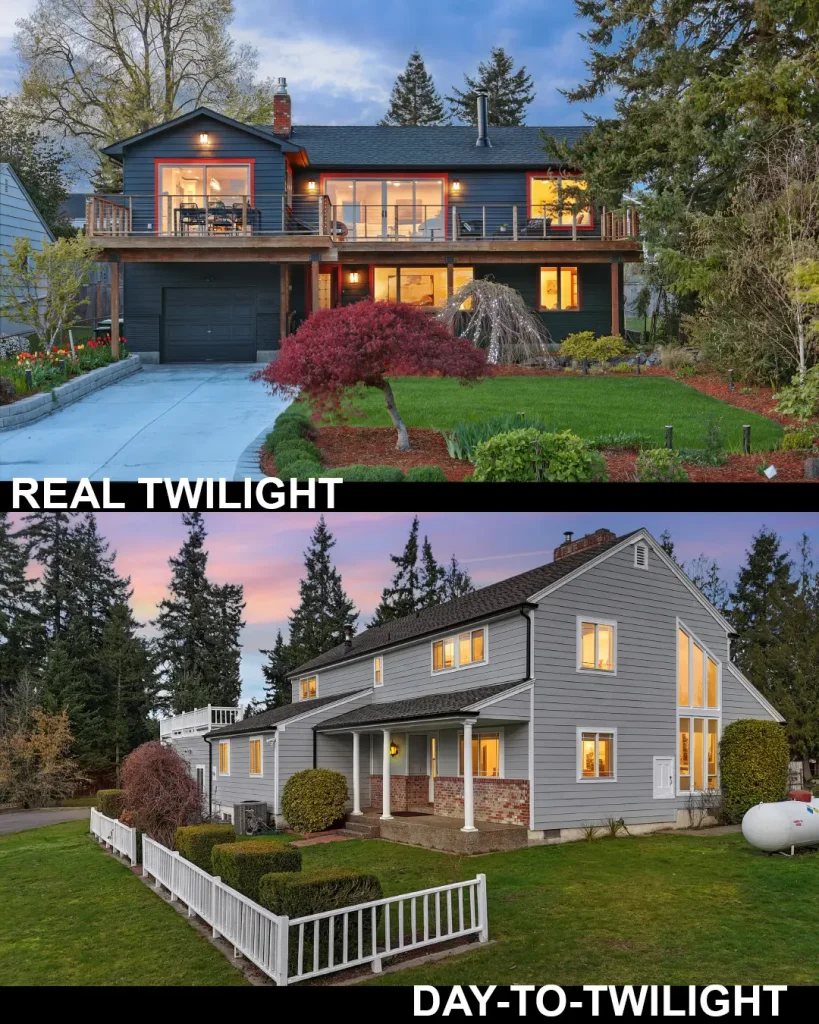
Many photographers choose between shooting at dusk or editing later.
Day-to-Twilight Editing
- Faster and more flexible
- No need to wait for perfect timing
- Cost-effective for large projects
Real Twilight Photography
- More natural lighting
- Requires precise timing
- Limited shooting window
For most workflows, editing offers a more scalable solution.
How Twilight Photos Help Sell Listings Faster
Twilight real estate photos don’t just look good—they improve performance:
- Increase online engagement
- Create a strong first impression
- Help buyers connect emotionally
- Make listings stand out from competitors
Even a single twilight image can significantly boost listing appeal.
Should You Outsource Twilight Editing?
Editing can be time-consuming, especially at scale. A professional editing service can:
- Deliver consistent, high-quality results
- Save hours of post-processing time
- Help you focus on shooting and client growth
Final Thoughts
Mastering twilight real estate photos is a valuable skill for both photographers and real estate professionals. With the right techniques, you can transform ordinary images into visually striking assets that attract more buyers.
Focus on natural lighting, balanced colors, and consistent editing. When done right, twilight images create a lasting impression and elevate your entire portfolio.