The Photoshop Guide for Real Estate Photographers
Kiran 4 min read min read 23 Mar 2026

In this Photoshop Guide for Real Estate Photographers, consistency is key. Whether you are working on HDR blending or color correction, maintaining a natural look is essential.
If you’re looking to outsource your editing, check our professional services:
https://tecpixel.com/real-estate-photo-editing/
You can also explore advanced Photoshop tutorials from Adobe:
https://helpx.adobe.com/photoshop/tutorials.html
This Photoshop Guide for Real Estate Photographers ensures your images look clean, bright, and market-ready.
Why Photoshop Is Essential for Real Estate Photography
Raw property photos rarely look perfect straight out of the camera. Lighting differences, window brightness, color casts, and perspective distortion are common challenges.
Using Photoshop allows photographers to:
- Balance interior and exterior lighting
- Correct vertical and horizontal lines
- Replace dull skies with vibrant ones
- Enhance colors and brightness
- Remove unwanted objects
- Create magazine-quality listing photos
For real estate professionals, high-quality edited photos can increase listing views, improve engagement, and help properties sell faster.
Photoshop Guide for Real Estate Photographers: Step-by-Step Workflow
1.Start with RAW Processing
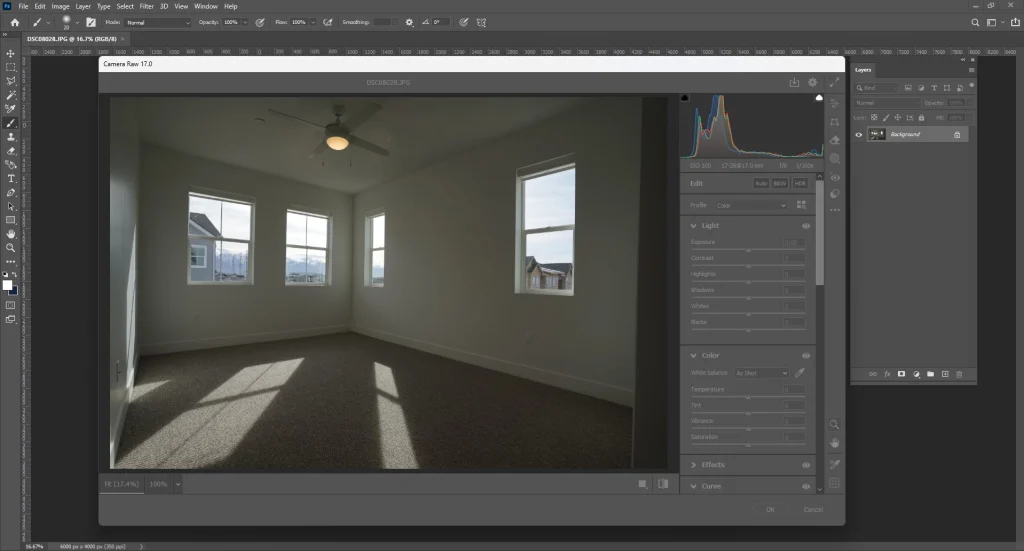
Before opening an image in Photoshop, the first step is to process the RAW file using Adobe Camera Raw or Lightroom.
Key adjustments include:
- Exposure correction
- White balance adjustment
- Highlight and shadow recovery
- Lens distortion correction
- Noise reduction
These basic adjustments help create a clean base image before advanced Photoshop editing.
2. HDR Blending for Balanced Lighting
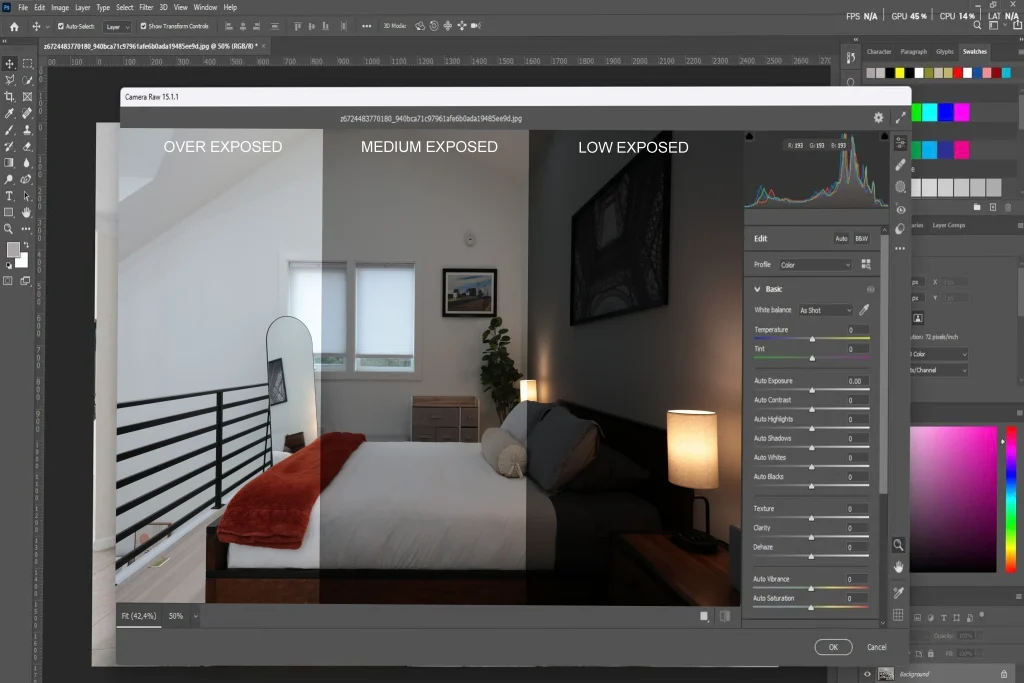
Real estate photographers often shoot bracketed exposures to capture both the bright windows and darker interior spaces.
In Photoshop you can blend these exposures using:
- Layer masks
- Luminosity masks
- Manual exposure blending
In this Photoshop Guide for Real Estate Photographers, we cover HDR blending
3.Correct Perspective and Vertical Lines
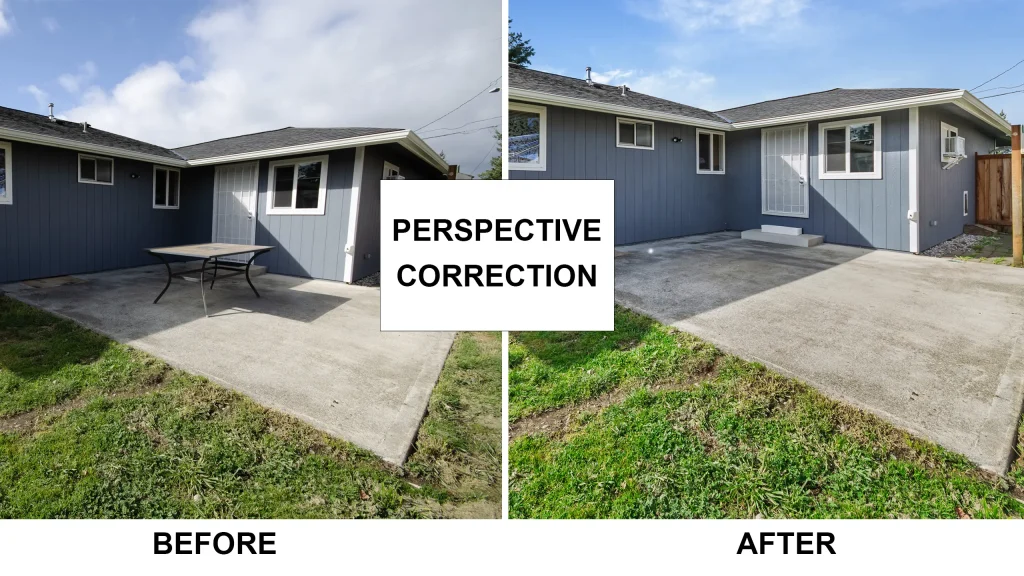
One of the most important steps in real estate editing is fixing perspective distortion.
Use Photoshop tools like:
- Transform → Perspective
- Warp Tool
- Camera Raw Geometry Panel
Correcting vertical lines ensures walls appear straight and natural, which makes the property look more professional.
4.Window Pull Technique
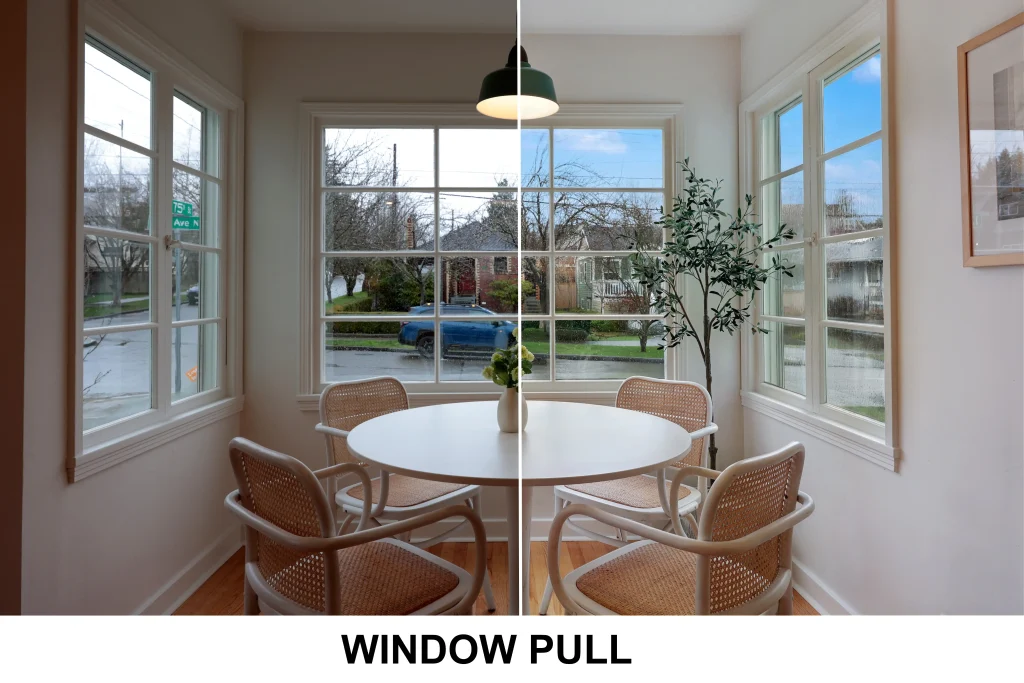
Windows often appear overexposed in interior shots.
The window pull technique involves blending a darker exposure of the window area to preserve exterior details.
Steps include:
- Place darker exposure above the base image
- Add a layer mask
- Paint the window area with a soft brush
This creates clear, natural-looking windows without unrealistic brightness.
5.Sky Replacement for Exterior Photos
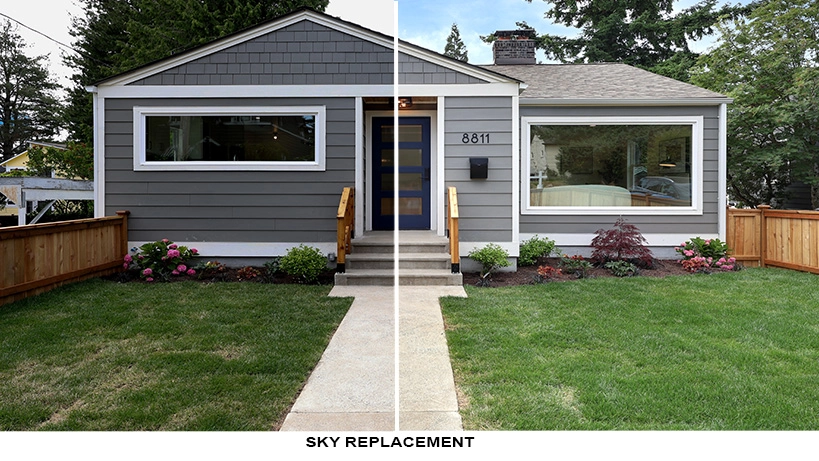
A cloudy or dull sky can reduce the impact of an exterior listing photo.
Photoshop’s Sky Replacement Tool allows you to quickly replace the sky with:
- Bright blue daytime skies
- Sunset skies for dramatic listings
- Light clouds for natural realism
Always choose skies that match the lighting direction and color temperature of the image.

Small distractions can reduce the appeal of a property photo.
Use Photoshop tools like:
- Clone Stamp Tool
- Healing Brush
- Content-Aware Fill
These tools help remove:
- Power cables
- Reflections
- Trash bins
- Wall marks
- Small clutter items
Clean images create a more polished and professional look.
7.Color Correction and Final Enhancements
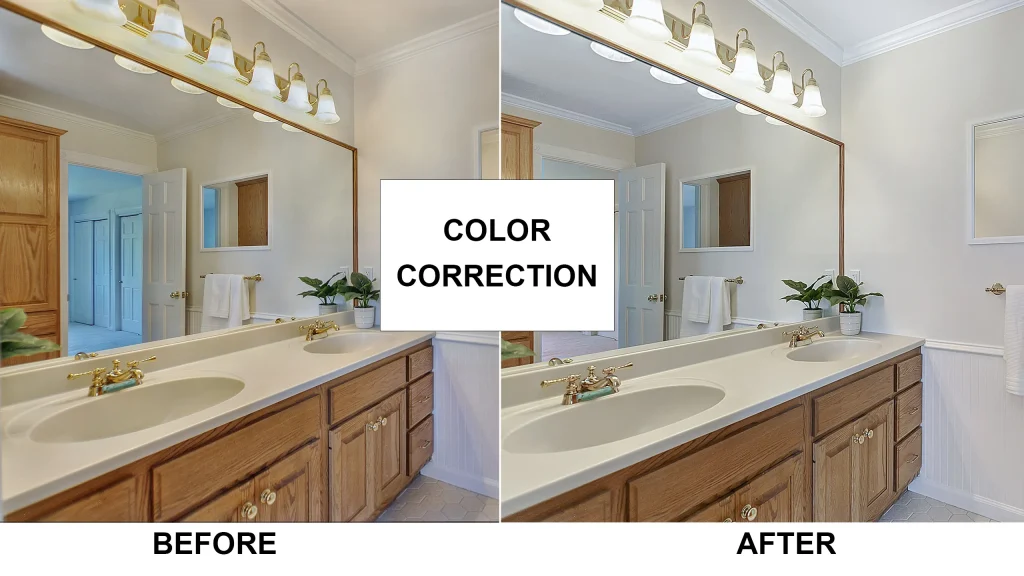
he final stage of editing focuses on enhancing the overall look of the image.
Adjust:
- Brightness and contrast
- Vibrance and saturation
- Color balance
- Selective lighting adjustments
The goal is to create images that look bright, clean, and natural without appearing over-edited.
Pro Tips for Real Estate Photoshop Editing
Professional editors follow several best practices:
✔ Keep colors natural and realistic
✔ Avoid overly dramatic HDR effects
✔ Maintain straight vertical lines
✔ Keep windows clear but realistic
✔ Ensure consistency across all listing photos
Consistency is especially important when editing multiple images for a property listing.
Final Thoughts
This Photoshop Guide for Real Estate Photographers covers everything you need to create professional, market-ready property images. Photoshop has become an essential tool for real estate photographers, enabling precise control over lighting, color, and composition. With the right workflow—including RAW processing, HDR blending, perspective correction, window pulls, and sky replacement—you can produce stunning visuals that stand out in a competitive market.
By mastering these techniques, you can significantly improve listing quality, attract more potential buyers, and build a strong, high-end portfolio.
For those looking to save time and scale their business, many photographers choose to outsource editing to professional real estate photo editing services, ensuring fast turnaround times and consistent, high-quality results.