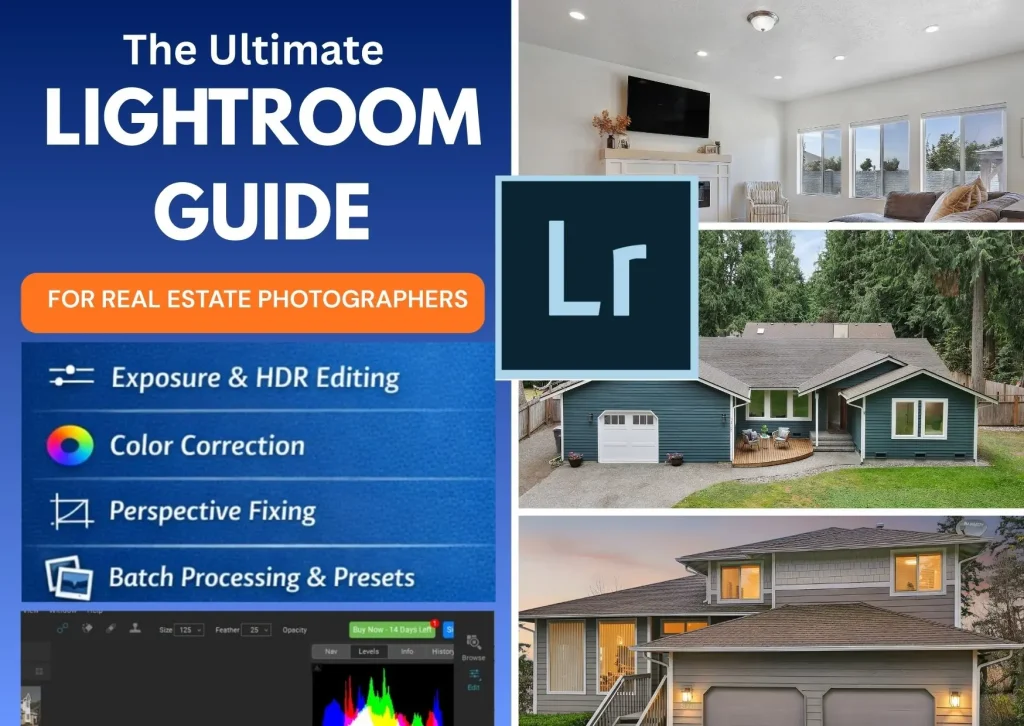
The Ultimate Lightroom Guide for Real Estate Photographers
Kiran 6 min read min read 16 Mar 2026
Real estate photography plays a crucial role in modern property marketing. Today, most homebuyers begin their property search online, and the first thing they notice in any listing is the photos. High-quality images make a property look more attractive, professional, and inviting. On the other hand, poorly edited photos can discourage potential buyers from exploring the listing further.
This Lightroom Guide for Real Estate Photographers explains how to edit property photos professionally using a fast and efficient workflow. Adobe Lightroom provides powerful tools that allow photographers to enhance exposure, correct colors, fix lens distortion, and maintain consistent editing across an entire property gallery.
By following this Lightroom guide for real estate photographers, you can transform ordinary property photos into bright, clean, and professional images that attract more attention online.
Why This Lightroom Guide for Real Estate Photographers Matters
Adobe Lightroom is one of the most widely used editing tools among professional photographers. Its non-destructive editing workflow and batch processing capabilities make it ideal for editing large real estate photo sets quickly.
For real estate photography, Lightroom offers several advantages:
• Non-destructive editing – Your original images remain unchanged.
• Batch editing – Apply the same adjustments to multiple images instantly.
• Color correction tools – Easily fix white balance and color casts.
• Lens correction features – Fix distortion from wide-angle lenses.
• Exposure adjustments – Balance bright windows and darker interiors.
Because a typical property shoot produces 20–40 images, Lightroom helps photographers maintain a consistent editing style while saving valuable time.
Importing and Organizing Photos in Lightroom
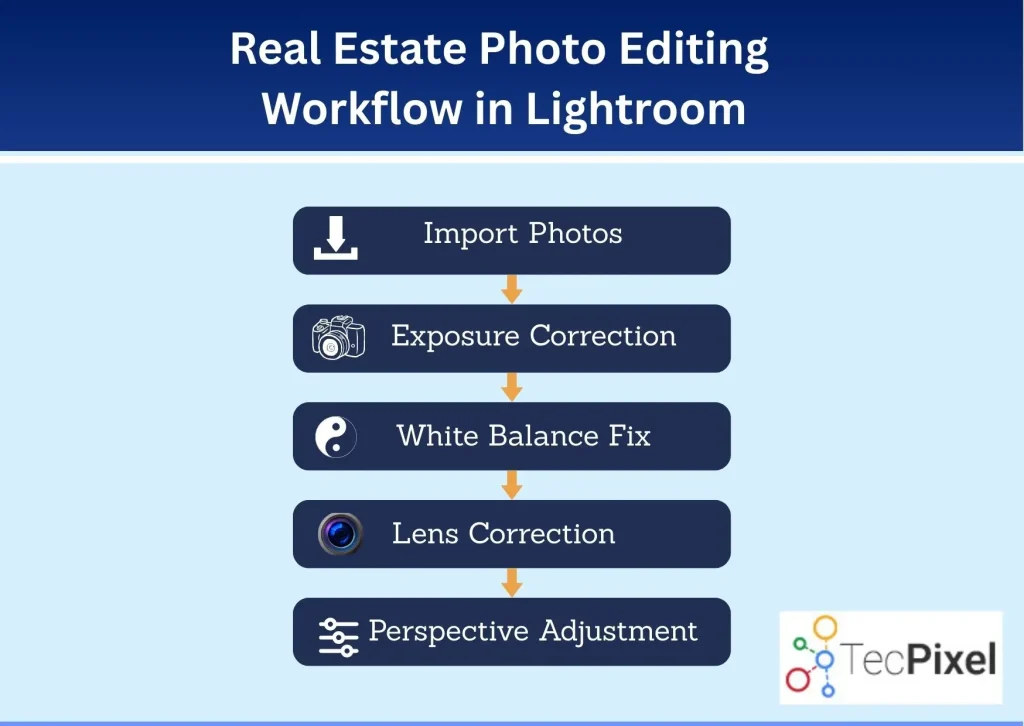
The first step in this Lightroom guide for real estate photographers is importing and organizing your images properly. A structured workflow ensures that your editing process remains efficient and professional.
Best practices for organizing photos
• Create a separate folder for each property listing.
• Rename files using a structured format such as:
PropertyAddress_LivingRoom_01
• Apply lens correction presets during import if possible.
• Add keywords like real estate photography, interior photography, and property listing photos.
Good organization allows photographers to handle multiple property shoots without confusion.
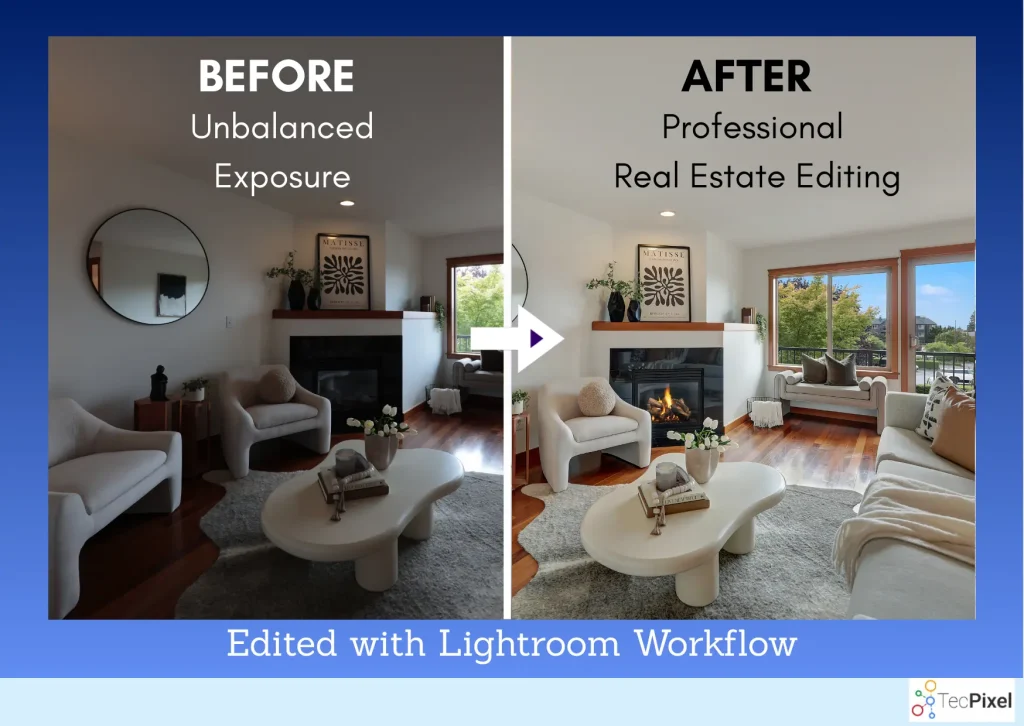
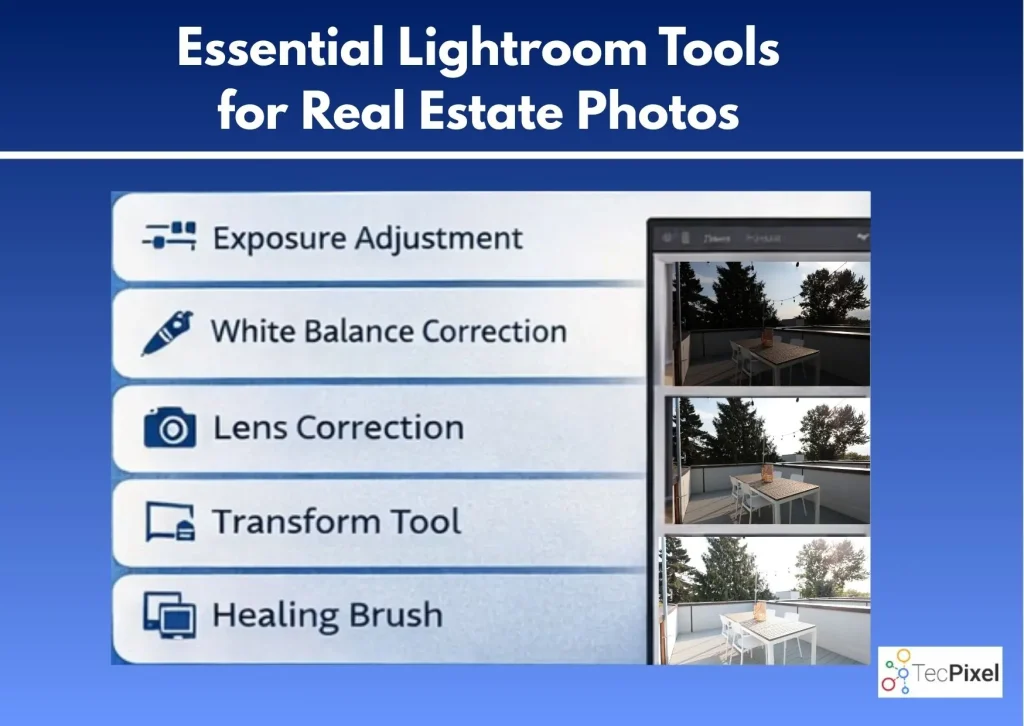
Correcting Exposure in Real Estate Photos
Exposure correction is one of the most important steps in any Lightroom guide for real estate photographers. Interior spaces often contain bright windows and darker areas, which creates lighting imbalance.
Lightroom’s Basic Panel provides powerful controls for fixing exposure issues.
Important settings to adjust
Exposure
Adjust the overall brightness of the image.
Highlights
Lower highlights to recover details from bright windows.
Shadows
Increase shadows to brighten darker parts of the room.
Whites and Blacks
Fine-tune contrast for a natural image balance.
A well-edited real estate image should look bright, balanced, and natural without appearing over-processed.
Fixing White Balance for Natural Colors
Incorrect white balance is a common problem in interior photography. Different light sources (window light, LED lights, tungsten bulbs) can create strange color casts.
Lightroom makes color correction easy.
How to fix white balance
- Use the White Balance Selector Tool (Eyedropper) on a neutral area.
- Adjust Temperature to correct warm or cool tones.
- Adjust Tint to remove green or magenta color shifts.
The goal is to make the image look clean and natural, not overly warm or overly cool.
Lens Correction for Wide-Angle Distortion
Real estate photographers often use wide-angle lenses to capture more of the room in one shot. However, wide lenses can cause distortion and curved lines.
Lightroom has built-in tools to fix this.
Steps for correcting lens distortion
- Open the Lens Corrections panel
- Enable Remove Chromatic Aberration
- Enable Profile Corrections
- Select the correct lens profile if Lightroom does not detect it automatically
This will correct barrel distortion and make walls and edges appear straighter.
Straightening Vertical Lines and Perspective
One of the most important editing steps in real estate photography is correcting perspective. Walls and vertical lines should look straight and natural.
Lightroom’s Transform Tool helps fix tilted lines and perspective distortion.
Best tools for perspective correction
- Auto Transform
- Vertical Adjustment
- Guided Upright Tool
Using the guided tool allows you to draw lines along walls or door frames, and Lightroom will automatically correct the perspective.
Straight lines make photos look more professional and realistic, which is important for property listings.
Enhancing Colors and Details
After correcting exposure and perspective, the next step is enhancing the overall look of the image.
Lightroom provides several tools to improve colors and details.
Vibrance vs Saturation
Vibrance increases color intensity without affecting skin tones or neutral colors too much.
Saturation increases all colors equally.
For real estate photography, it is better to increase Vibrance slightly instead of overusing saturation.
Texture and Clarity
- Texture enhances fine details.
- Clarity improves midtone contrast.
Use these tools carefully to keep images looking natural.
Removing Unwanted Objects
Sometimes small distractions appear in property photos, such as:
- Light switches
- Sensor dust spots
- Small wall marks
- Minor floor imperfections
Lightroom’s Healing Brush Tool can quickly remove these small distractions.
This helps create clean and polished property images without major editing work.
Batch Editing for Faster Workflow
Real estate photographers often deliver 20–40 images per listing, so editing each photo individually can take too long.
Lightroom’s batch editing feature solves this problem.
How batch editing works
- Edit one photo completely.
- Select the edited photo.
- Copy settings.
- Select multiple photos.
- Paste settings or sync adjustments.
This ensures consistent lighting, color, and style across the entire property gallery.
Batch editing is one of the biggest reasons Lightroom is widely used in real estate photography workflows.
Exporting Photos for Real Estate Listings
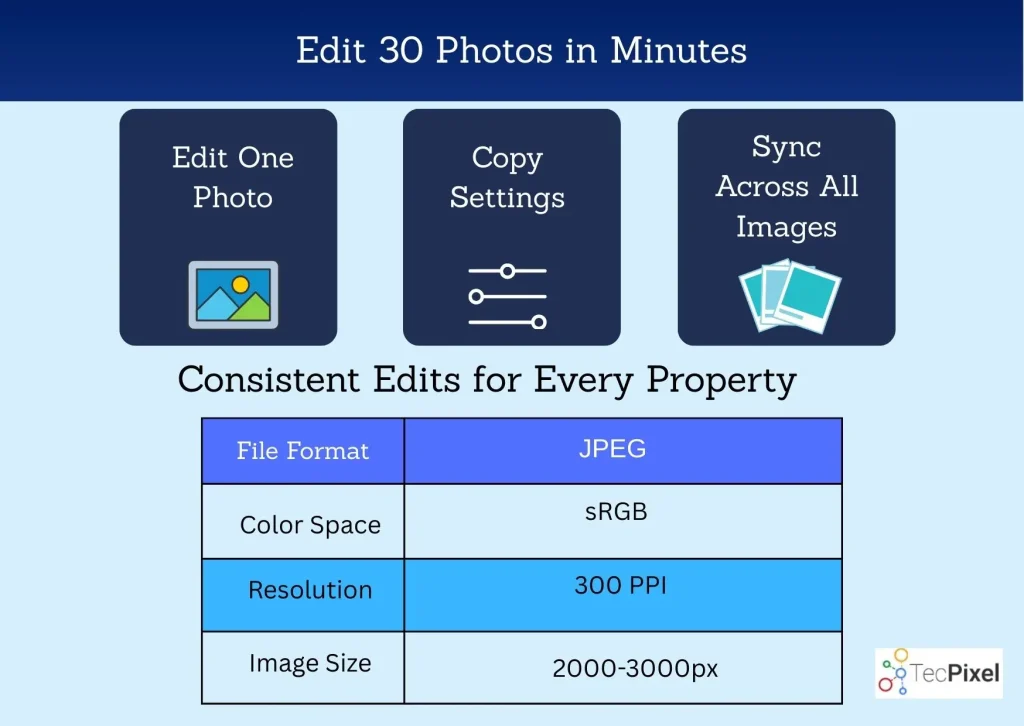
After editing is complete, the final step is exporting images in the correct format.
Most real estate platforms have specific image requirements.
Recommended export settings
- File format: JPEG
- Color space: sRGB
- Resolution: 300 PPI
- Image size: 2000–3000 pixels on the long edge
- Quality: 80–100%
These settings ensure images look sharp while keeping file sizes manageable for online listings.
Lightroom vs Professional Real Estate Photo Editing
While Lightroom is a powerful tool, many photographers choose to outsource editing to professional editing companies.
Professional editors can provide services such as:
Outsourcing editing allows photographers to focus more on shooting properties and growing their business.
Companies like TecPixel specialize in professional real estate photo editing services for photographers and real estate agents.
Final Thoughts
Final Thoughts
This Lightroom guide for real estate photographers provides a complete overview of how to edit property photos using an efficient workflow. By mastering exposure correction, color balancing, perspective fixes, and batch editing, photographers can deliver high-quality images that enhance property listings.
In today’s digital real estate market, professional images are essential. Listings with high-quality photos attract more views, generate stronger buyer interest, and often sell faster.
Whether you are new to real estate photography or an experienced professional, following this Lightroom guide for real estate photographers will help you produce consistent and visually appealing property images.